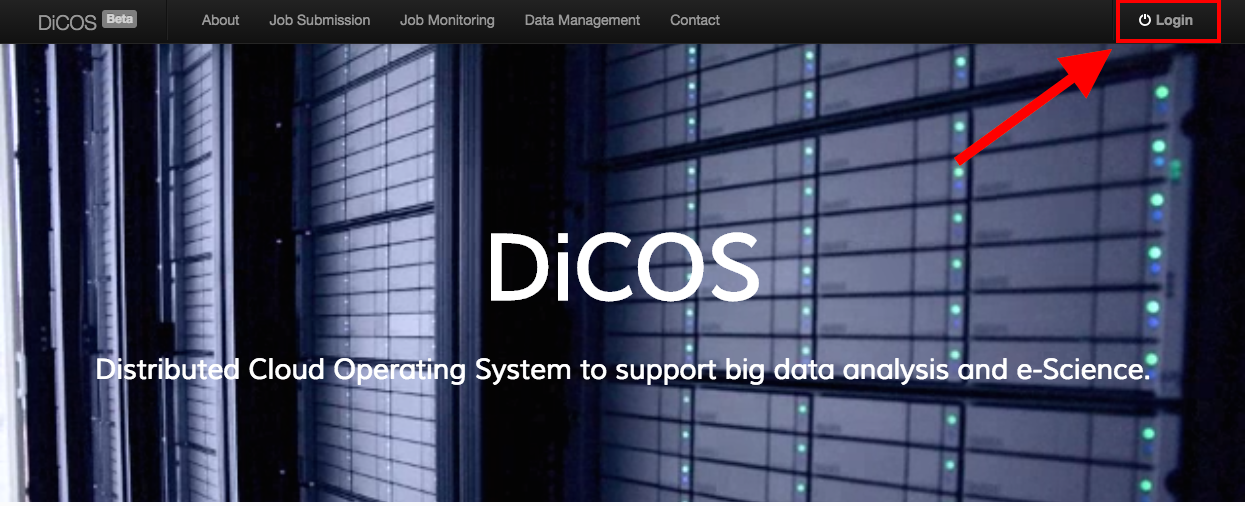
Step 0. Login
Click the login button at top right.
(Click the picture to enlarge)
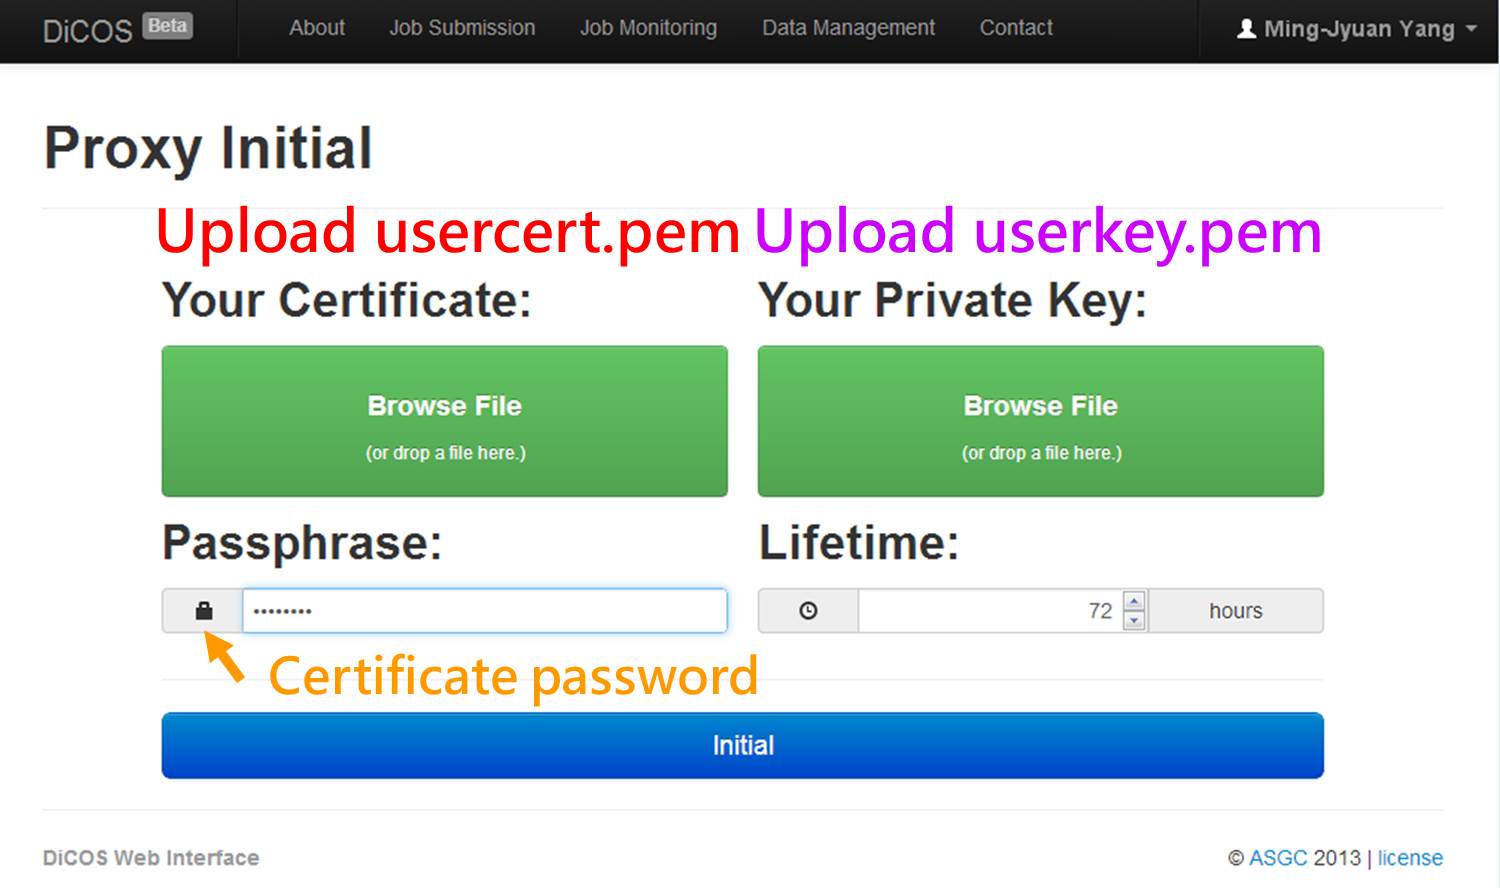
Step 1. Initiate Proxy
After logining, you have to import your usercert.pem, userkey.pem, and enter passphrase to initiate proxy. System will verify your identity, then help you to submit jobs.
(Click the picture to enlarge)
| Field Name | Description |
|---|---|
| Your Certificate | Select the usercert.pem file. |
| Your Private | Select the userkey.pem file. |
| Passphrase | The Certificate password. |
| Lifetime | Available time after proxy initial, default time is 72 hours, maximum time: 168 hours, minimum time: 1 hour. |
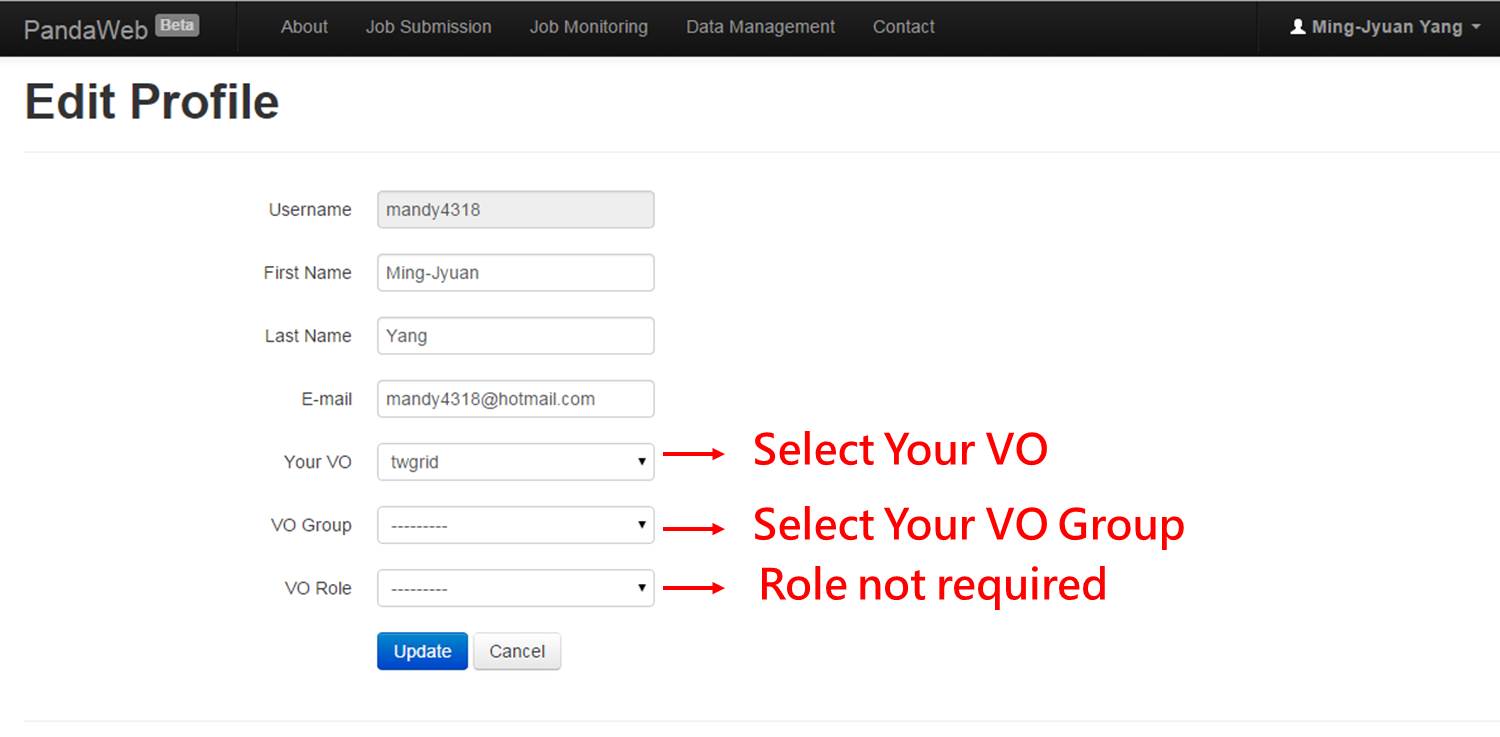
Step 1.1 First Initiate Proxy
First proxy initial, you need to setup some field of Profile page.
(Click the picture to enlarge)
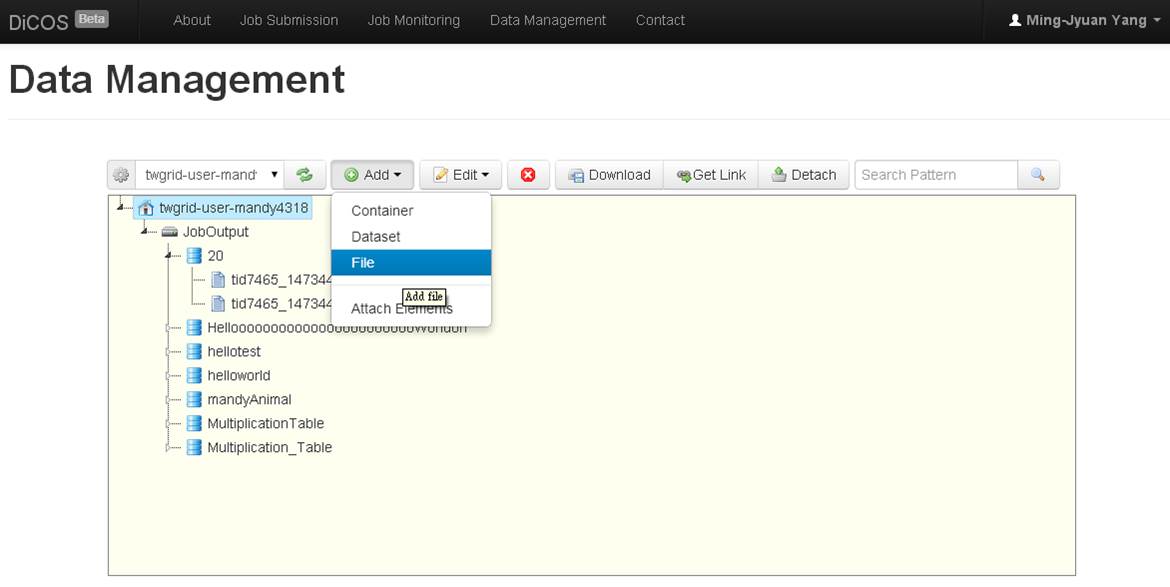
Step 2. Upload File
At Data Management page, upload your input files or binary files before job submission.
(Click the picture to enlarge)
- Attention:
☆ File name cannot be same
☆ A Dataset is defined as a set of File
☆ A Container is defined as a set of Dataset
☆ Dataset and Container can submit job in batch mode
☆ Container include Container and Dataset, but Dataset only include File
☆ Unlimited multi-layer(but only Container can repeat)
☆ Cannot change the name of Container, Dataset and File
☆ Only File can be removed
☆ If you have several input files, you should compress them (tar) by yourself before submission, and write decompress command (tar –zxf filename) in your script.
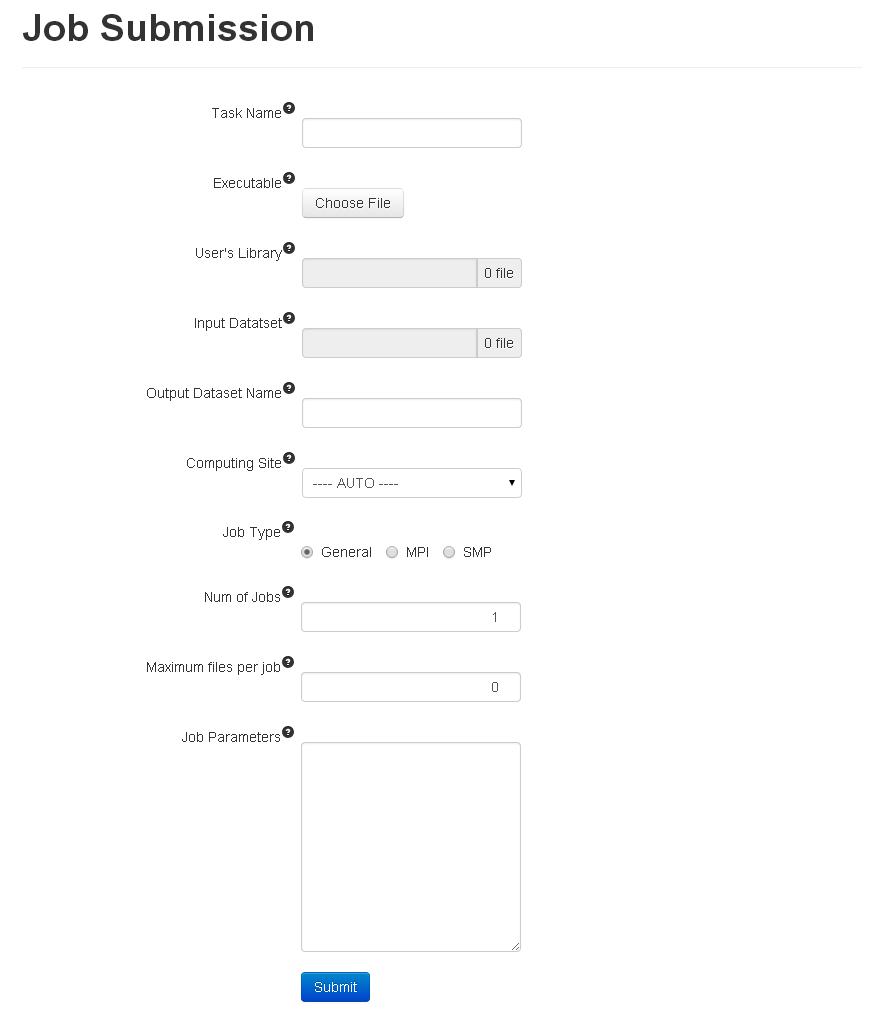
Step 3. Job Submission
(Click the picture to enlarge)
The describe of parameters are as follow:
- Task Name: Defined name for task. Note that task name cannot be the same.
- Executable: Executable files (binary or script)
- User’s Library: Function library used for executing task, can be left blank or select your input files.
-
Input Dataset: Choose input file, dataset or left blank.
☆ If you left blank, can upload files up to 1000.
☆ Select file or dataset, system may calculate number of files, the limit is“Num of Jobs” × “Maximum files per job” ~= “Num of Input Files”
-
Output Dataset Name: Dataset name for output after job finish. Default name is Task Name.
- Computing Site: Select which site you want to submit. Default site is to select automatically the most free site to submit your job.
- Job Type: Select your job type.
- Number of Jobs: Resource used for the task. Single job submission is set to 1; Batch job submission will separate according to the number of input files.
- Maximum file per job: Set the maximum input files for one job.
- Job Parameter: Provides advanced option (please using blank between parameters)
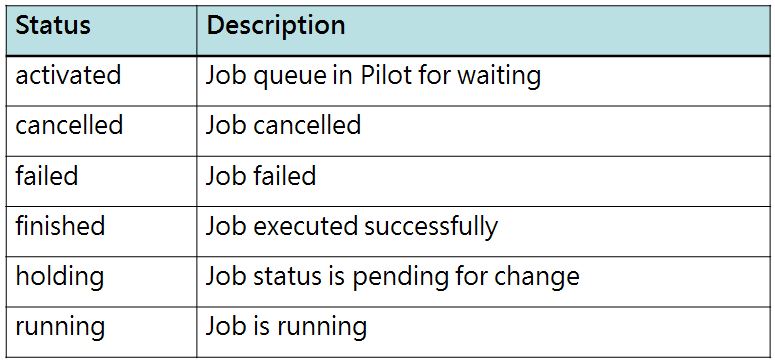
Step 4. Job Monitoring
At Job Monitoring page, you can monitor job status and according time to search.
(Click the picture to enlarge)
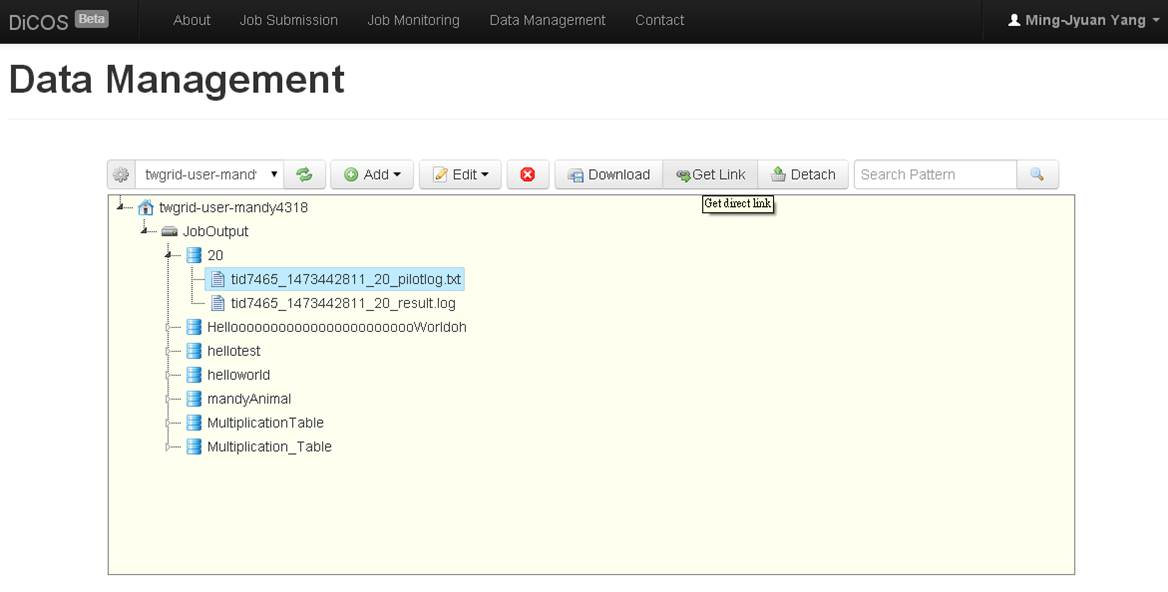
Step 5. Download File
Results can be downloaded at Data Management page or perform other operations when job is completed.
Other Explanations:
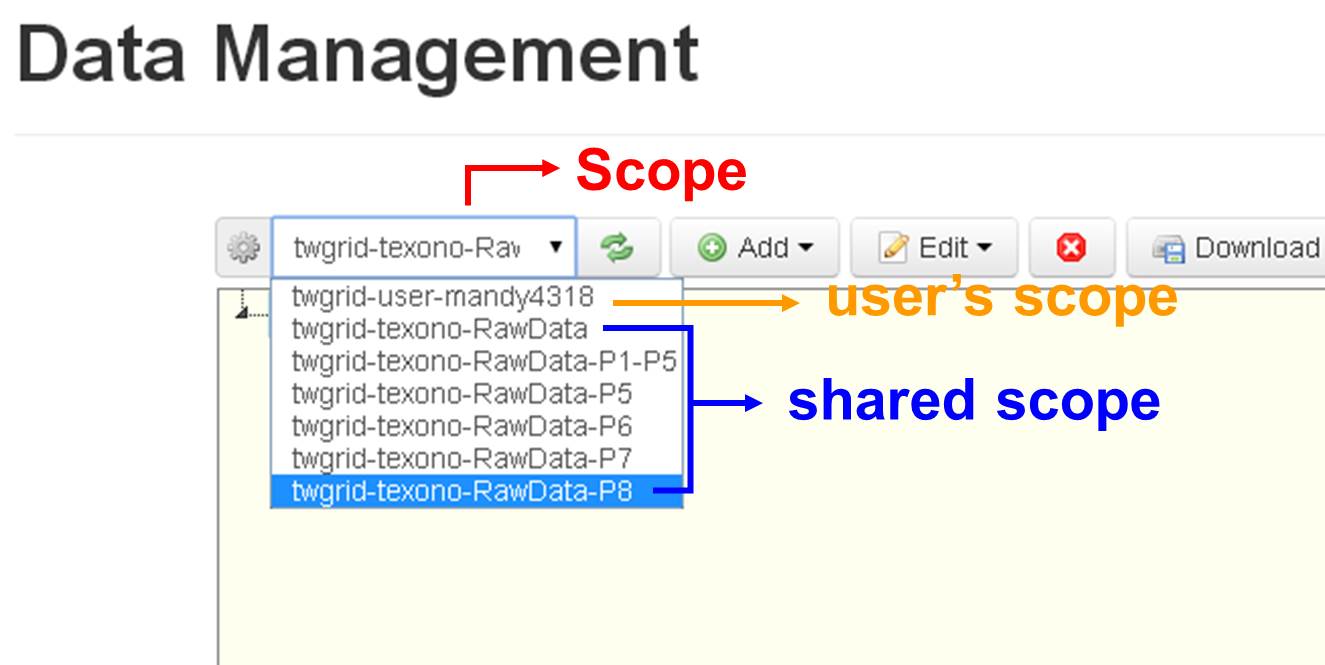
#Scope
(Click the picture to enlarge)
- To divide into two part
- User’s scope (for example:
twgrid-user-mandy4318) - Shared scope
- User’s scope (for example:
- System only allow copy files in shared scope
- You can copy File to other Dataset or copy File from shared scope to Dataset of your user’s scope.
- You can copy Dataset to other Container or copy Dataset from shared scope to Container of your user’s scope.
#Auto Correction
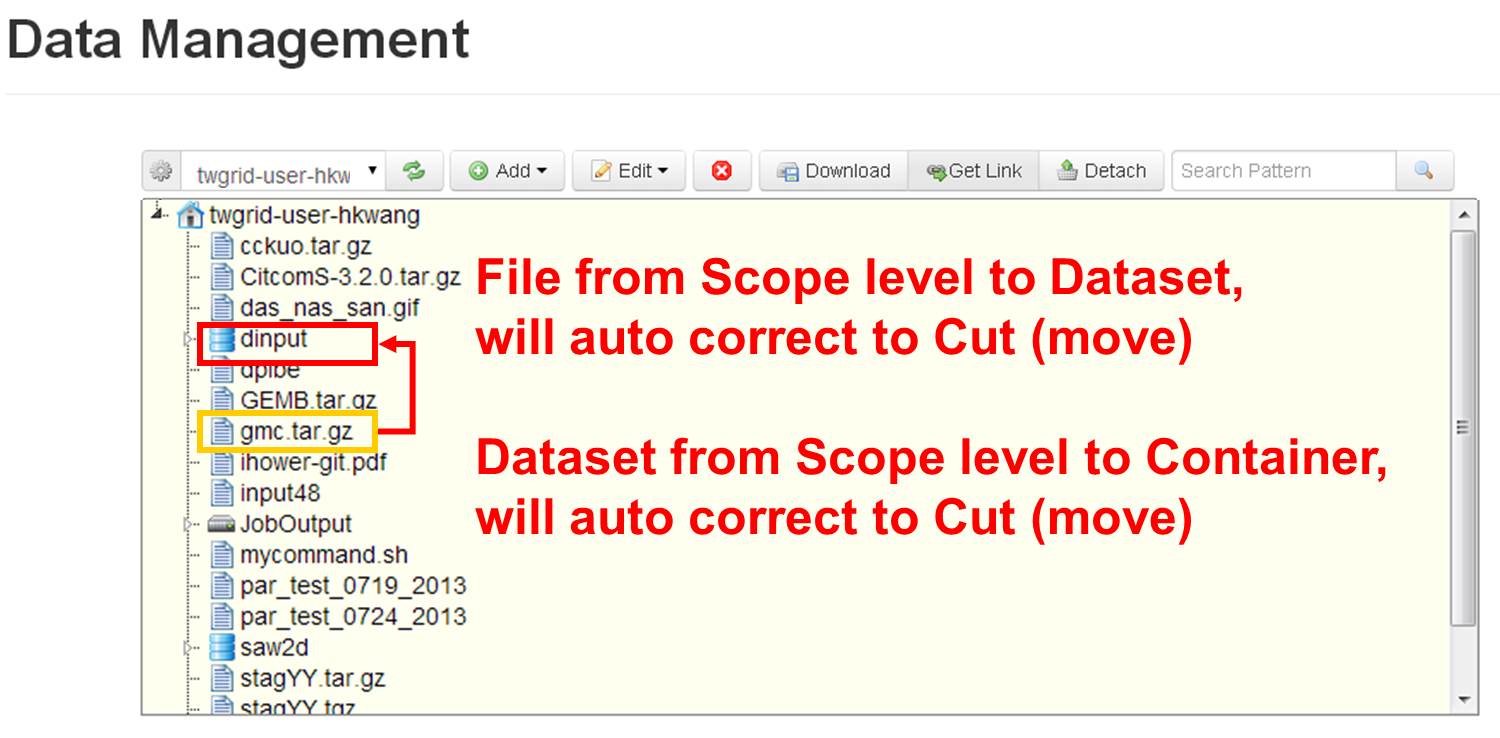
(Click the picture to enlarge)
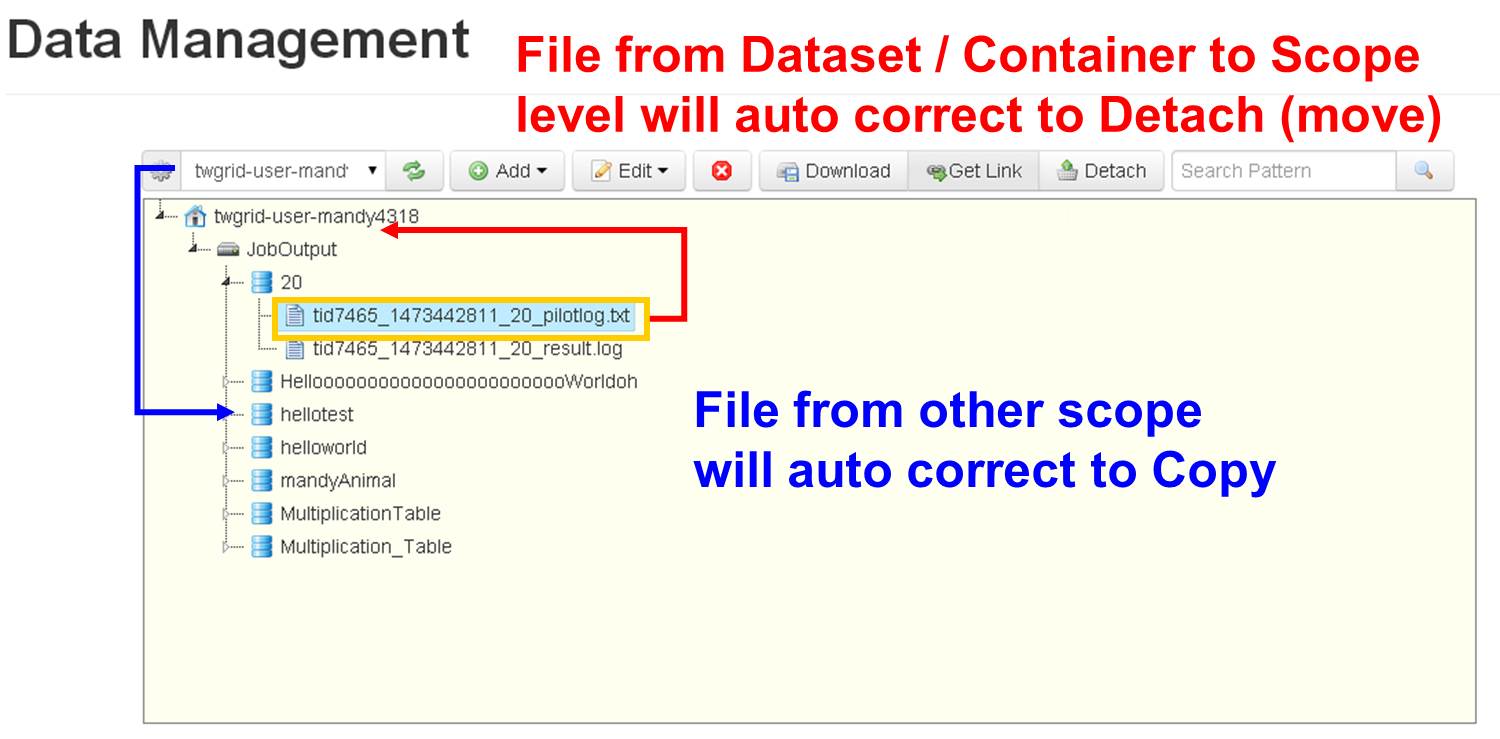
(Click the picture to enlarge)
#Text Editor
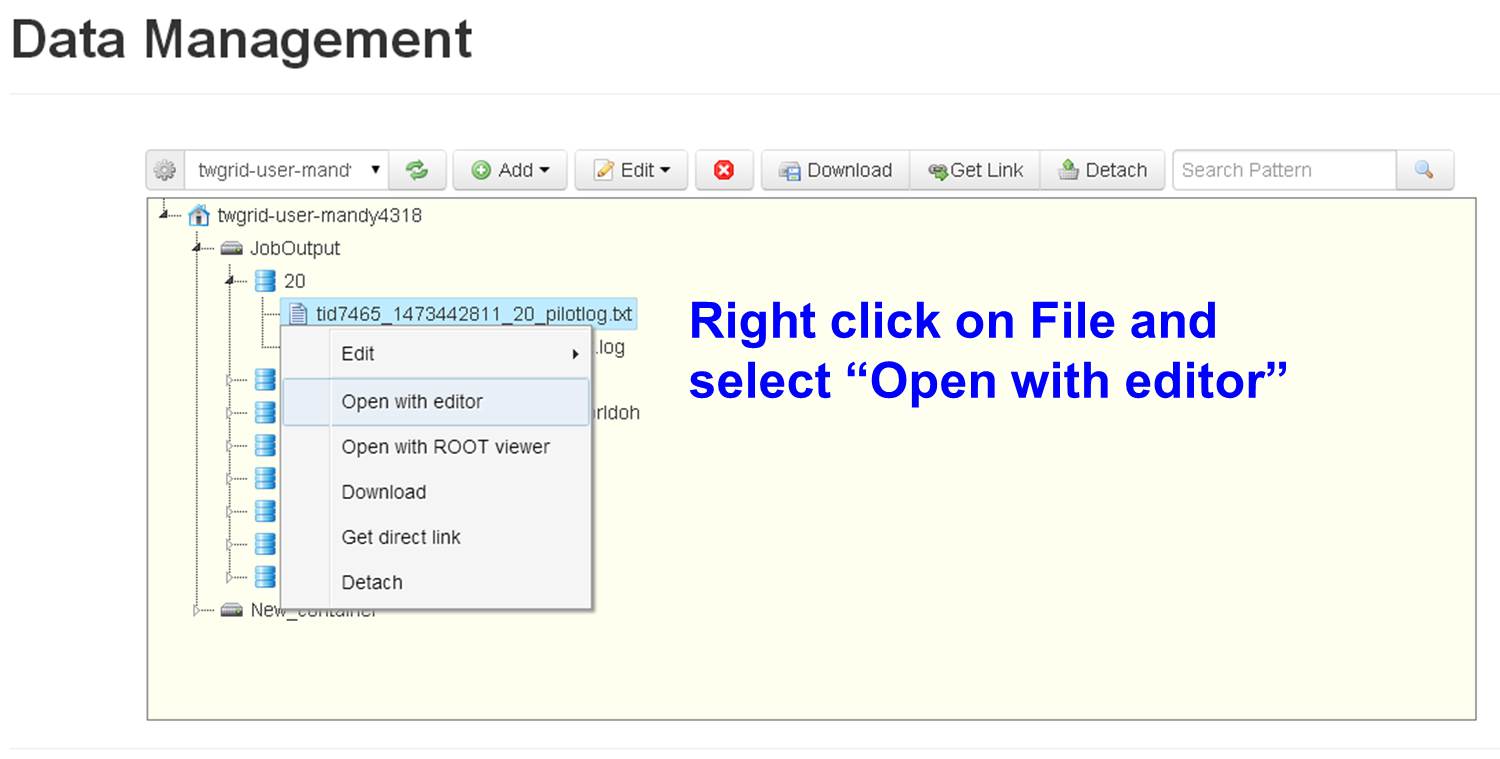
(Click the picture to enlarge)
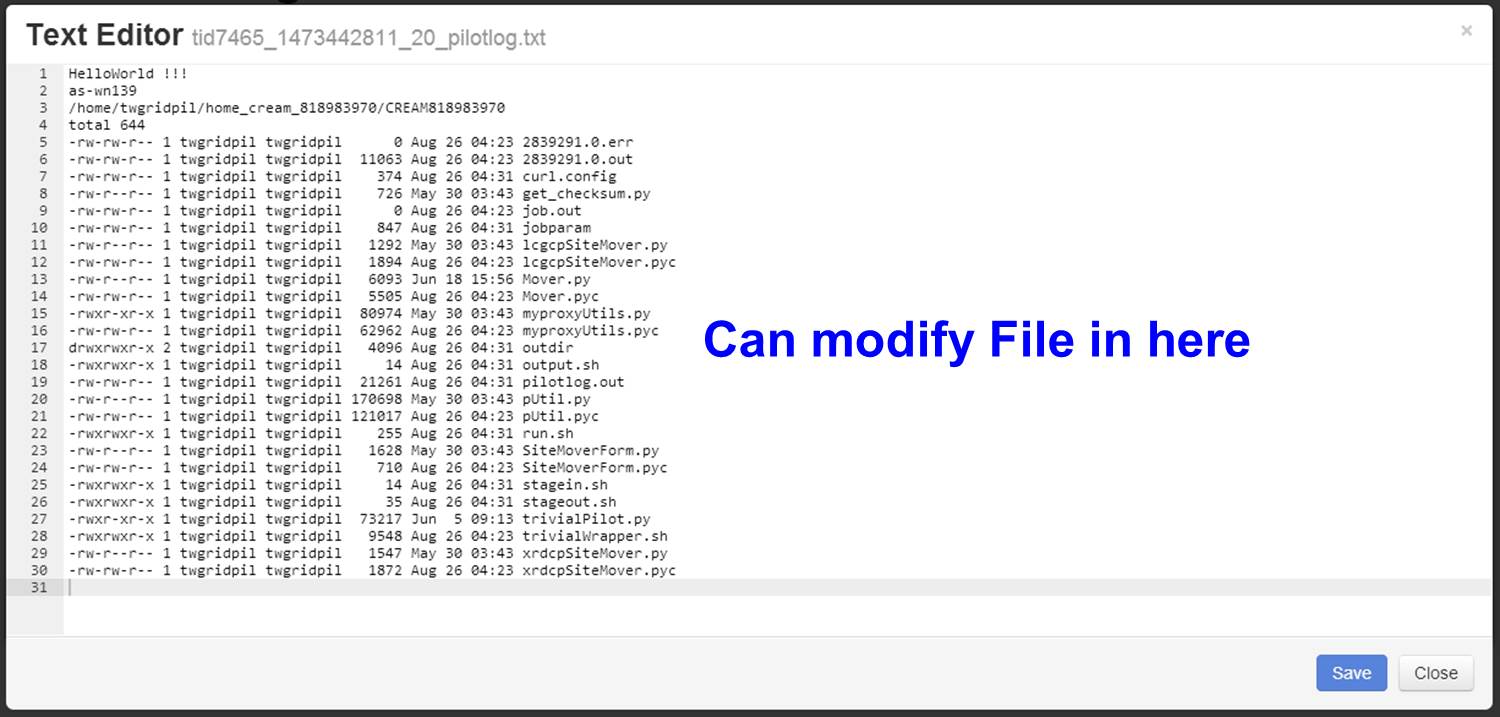
(Click the picture to enlarge)
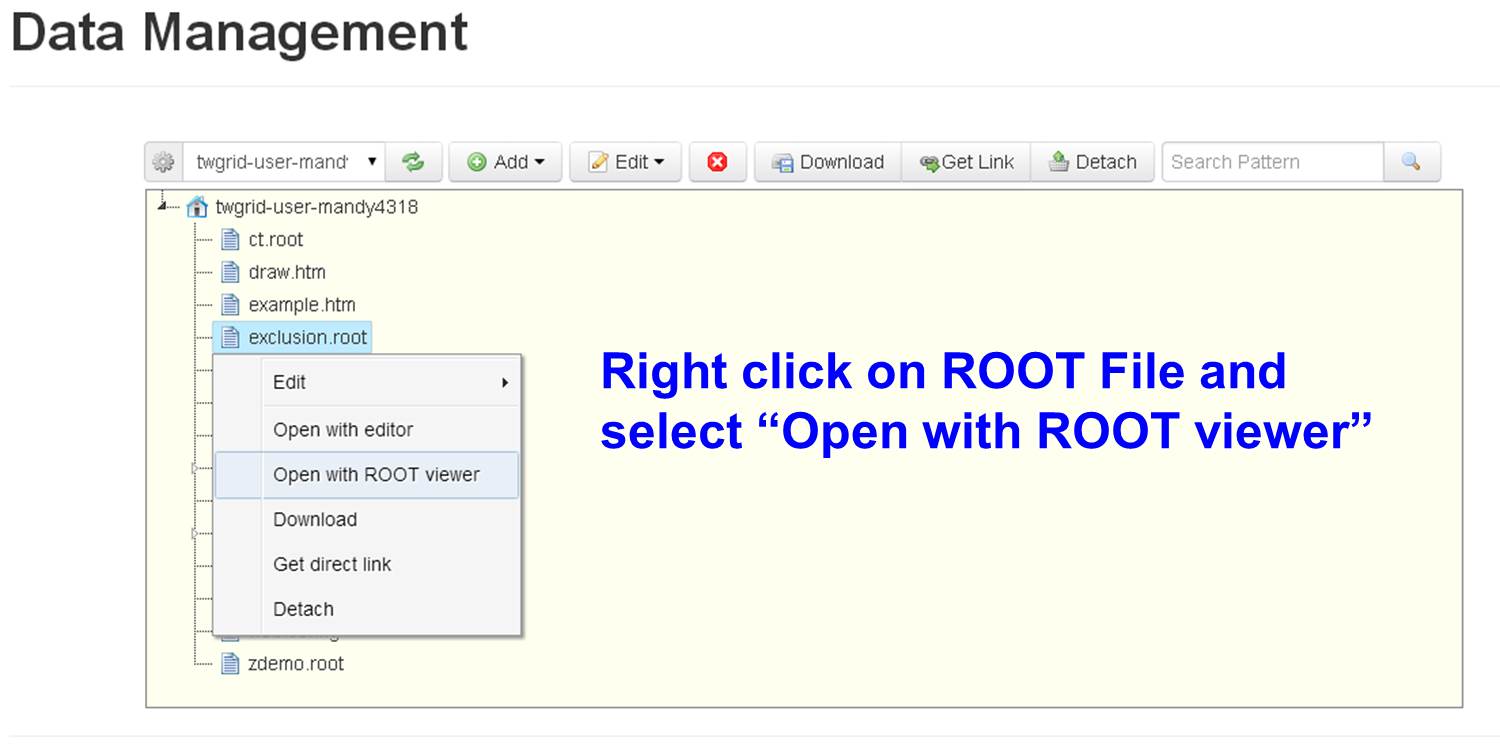
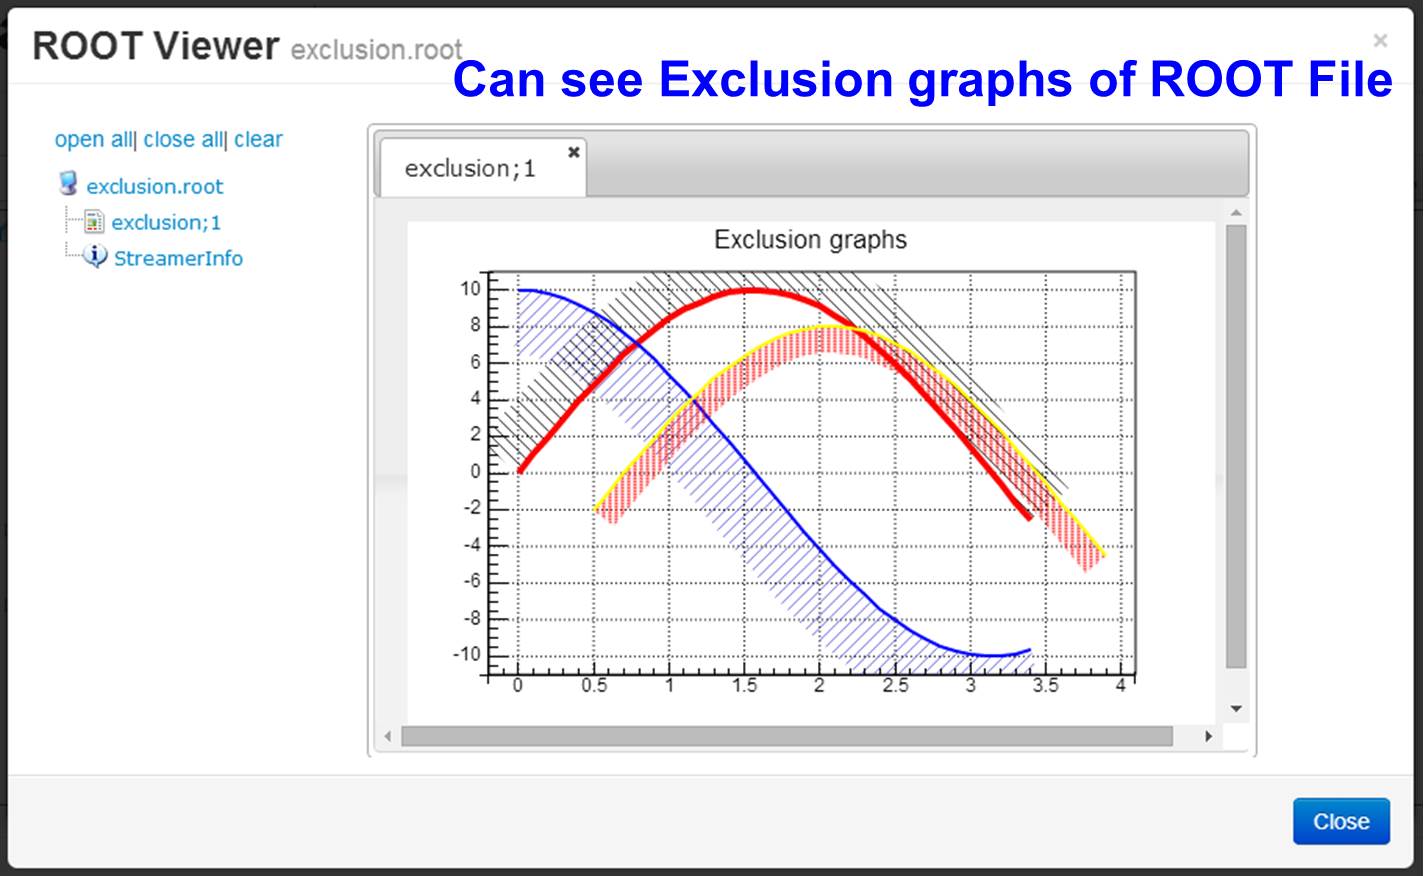
#ROOT viewer
This article was last modified 11 years, 3 months ago by Dennis Liou.